

Introduction
When the summer months roll around, there is nothing nicer than being able to sit outside and enjoy outdoor living. There is no reason why you shouldn’t be able to sit outside even when the sun has gone down, especially not when you can hang patio string lights to illuminate the area and promote a cozy and calming ambience. Using planter posts to hang patio string lights is an innovative way to work around not having anywhere else to hang them, and we are going to look at how you can do this yourself, and why using planter posts is a great solution. Read on to find out more.
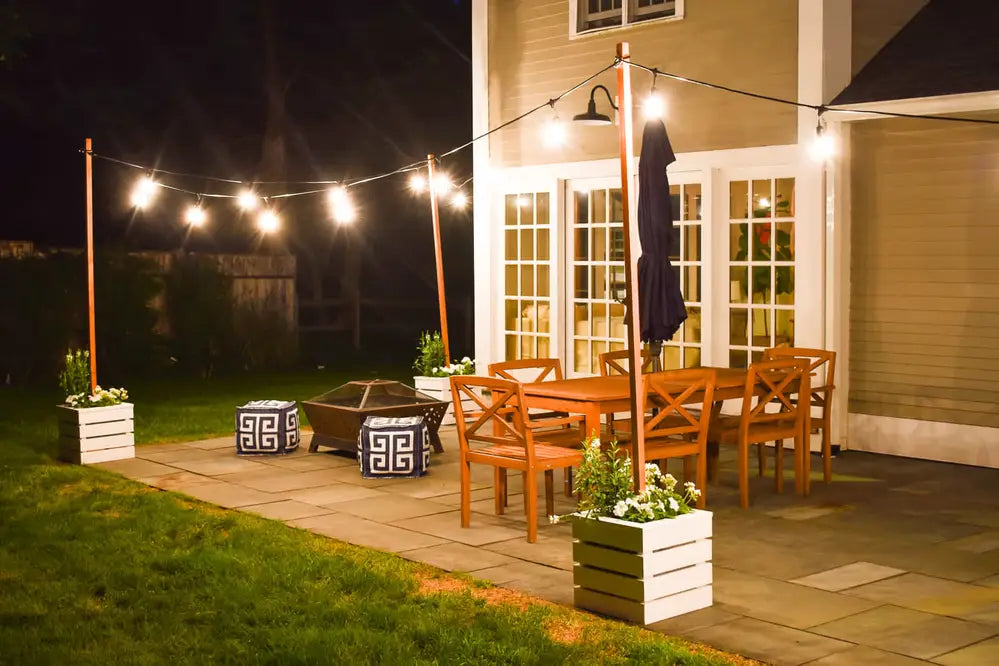
Photo from shutterstock
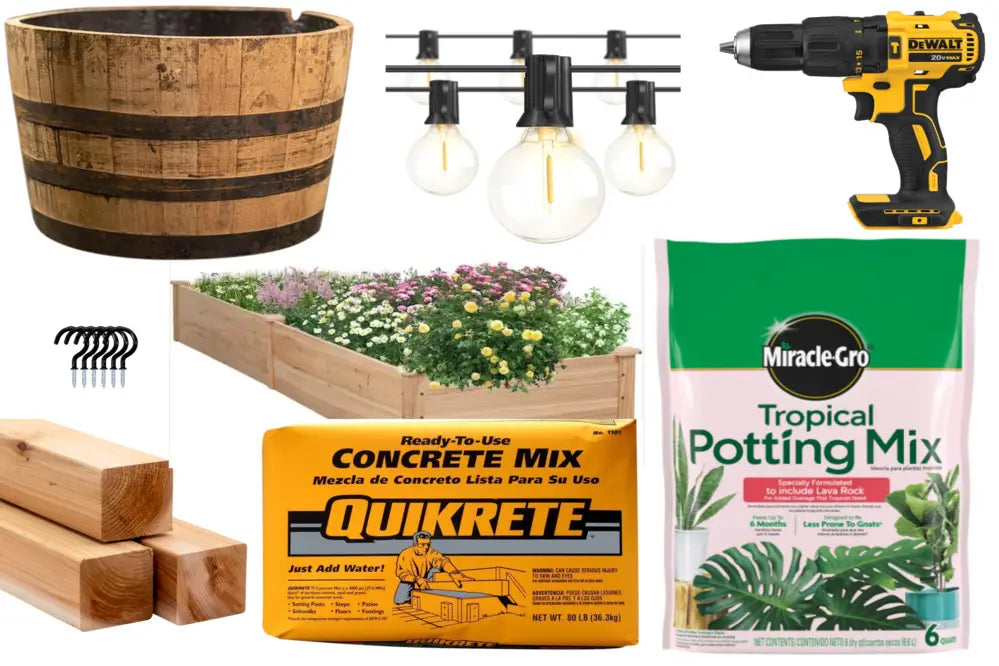
You Will Need
- Planters
- 4x4 x8’ posts
- Concrete
- String Lights
- Cup Hooks
- Drill
- Potting Mix
- Flowers
Follow our easy step-by-step instructions below to get started on creating your very own planter posts:
Step One: Fill the Planter with Water and Concrete Mix
Start by selecting a sturdy planter that has a wide enough base to provide stability. Once you’ve chosen your planter, fill it halfway with a mixture of water and concrete. This combination will serve as the foundation for your planter posts, ensuring they stand firm against the elements.

Step Two: Stabilise the Post Inside the Planter
Next, carefully insert the post into the center of the planter, ensuring it stands upright. To guarantee a straight alignment, use a level to check the position of the post before the concrete mixture sets.

Step Three: Drill Holes for Drainage
To prevent water from potentially damaging your planter posts, drill several drainage holes above the concrete line. These holes will facilitate proper water drainage, ensuring the longevity of your planters and the health of your plants.

Step Four: Add Rocks, Soil and Plants to the Planter
When the concrete is dried and set, you can add soil to the planters and pot flowers or rocks to make it look visually attractive. There are no limits here to what you can do- from pretty rockery to decorations to bright, colorful flowers, you can choose whatever you like to jazz up the planter posts and compliment the visual appeal of the patio lights perfectly.

Step Five: Attach the Cup Hooks
Attach the hooks to the top side of the planter posts so that you can hang the string lights. When you’re doing this, make sure that the hooks are securely fastened to make sure that the weight of the lights will be supported.

Step Six: Hang the String Lights
Before you hang the lights, make sure that they work by plugging them into the socket and turning them on. Then you can hang the string lights onto the posts, starting at the point where they will plug into the outdoor electrical socket. Once they are all in place, turn them on and admire the end result!

Photo from shutterstock
Conclusion
There is nothing more satisfying than embarking on a DIY project that you can sit and enjoy with friends and family. Though you may have felt like you couldn’t hang patio lights because you didn’t have a suitable area to hang them, this post has shown you that with a bit of creativity, you can use planter posts instead to hang the lights, as well as create beautiful planters too.
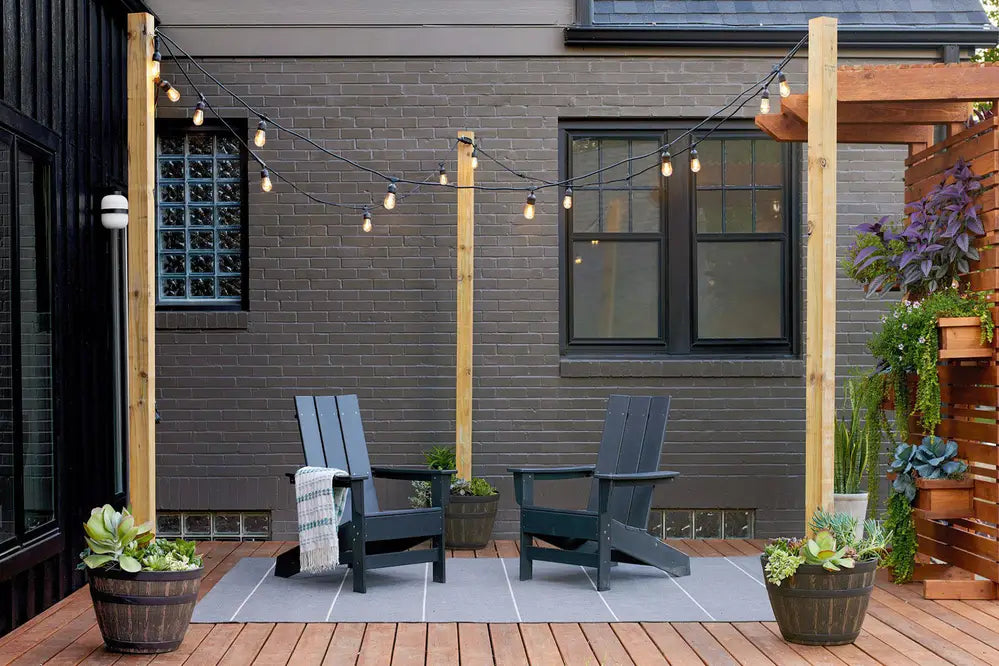
Photo from shutterstock
Crafting planter posts to hang string lights outside is a great summer project, and you can be as creative as you like with what goes in the planters, as well as what type of lights you choose to use. As the seasons change, you can mix up the look of the planters, changing the flowers or design, but still always have a cozy and beautiful lit up outdoor space to enjoy. What are you waiting for? Follow our easy guide today and get to work on lighting up your own outdoor space using planter posts.
➡️ How to Hang String Lights on a Patio and Illuminate Your Backyard Space
← Older post Newer post →